How to initiate RTA Integration process?
Print
Modified on: Thu, 16 Jan, 2025 at 12:23 PM
RTA Integration is an important and powerful tool for all partners, it not only gives all details of the investors but also can help to track investments on a real-time basis and manage the portfolio in a holistic way.
Advantages of RTA integration:
Immediately after RTA integration is processed, all the clients will be added to your dashboard. No need to manually add or send them referral links.
- Free tracking interface
Note
After following the below steps, it will take 12-24 hours to show the feeds in your partner dashboard
Ensure CAMS and Karvy credentials are correctly mentioned
This RTA integration process can be done for Gmail domain mail ids only as the auto-forwarding option is not enabled in other domains
For tracking client's investments in other ARN, please click here
Once the RTA integration process gets completed, support ticket can be raised, we will generate the feeds from our end.
To initiate RTA integration, please follow the below steps:
STEP 1
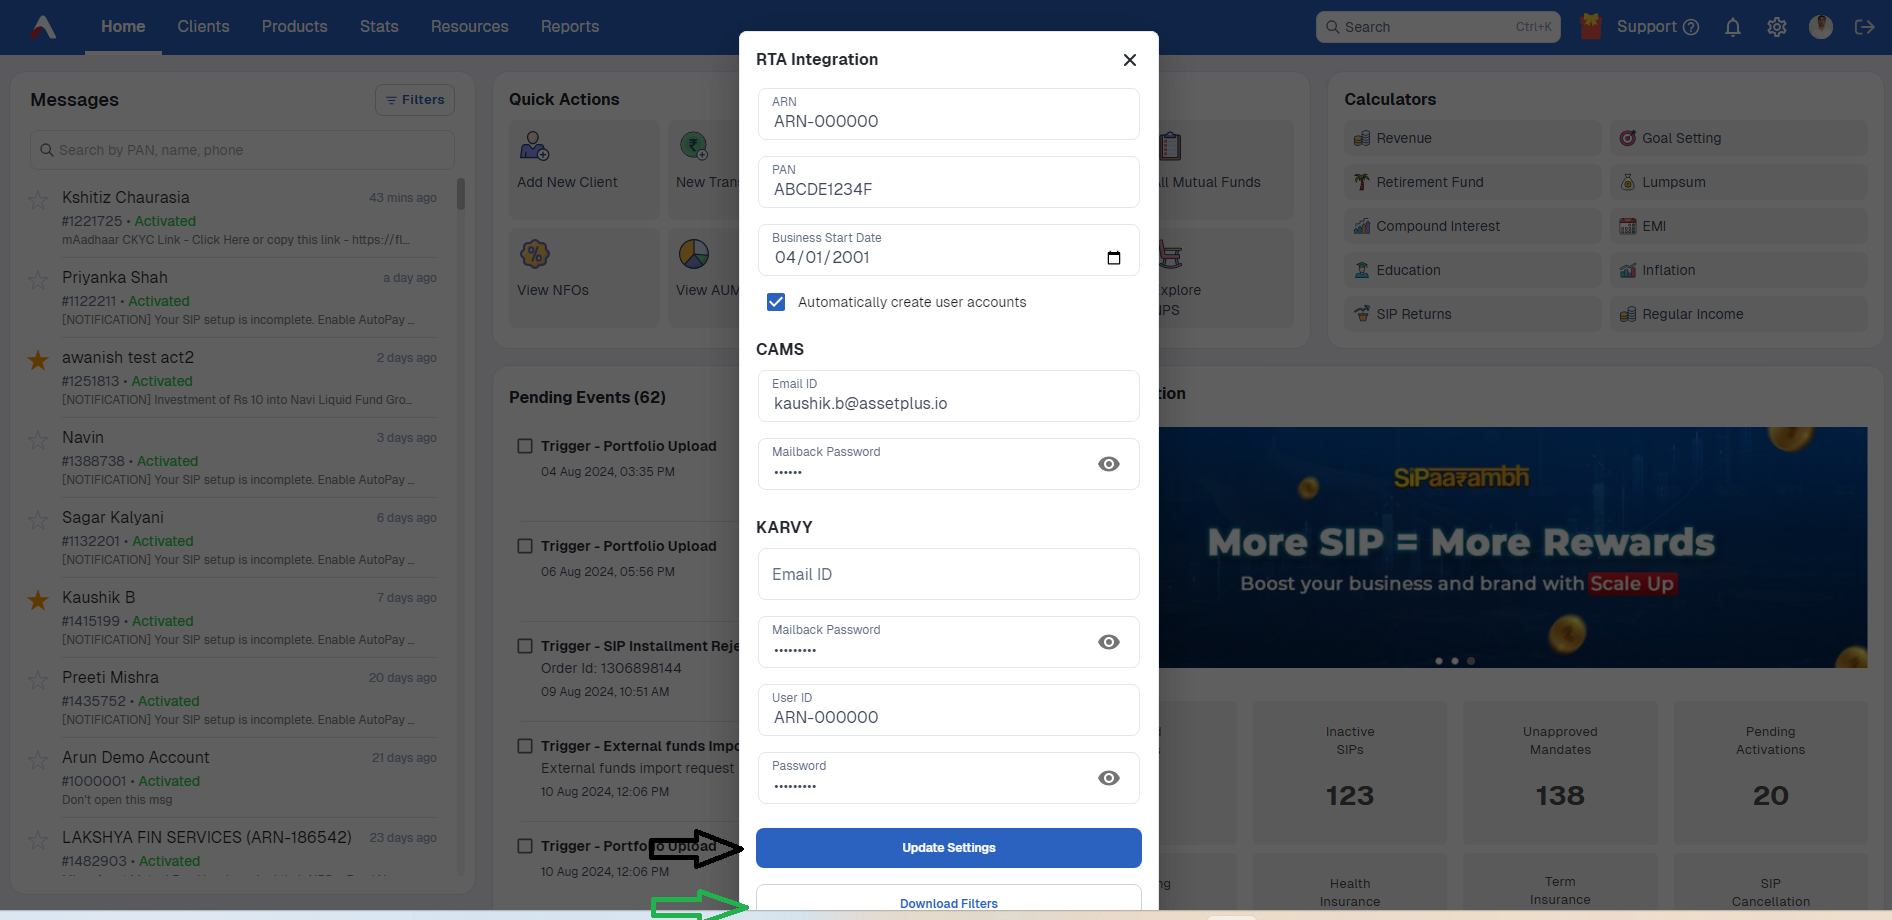
Click on Settings Icon -> RTA Integration

STEP 2
Fill in all the required details, such as ARN Number, PAN number, Business start date, CAMS and Kfintech details. Also, click the check box that states Automatically create user accounts to create accounts of all existing clients.
For CAMS, the password needs to be entered in mailback password. If you do not have a password for CAMS, please enter 123456 as a password.
For Kfintech, the mailback password and password mentioned in the Kfintech section are the same. Please enter the same passwords for both sections.
If you don't have any of the KRA's, the fields can be left blank.
STEP 3
After filling it up, click on update settings and then on download filters as shown above.
STEP 4
Login to your Gmail id. Then click on settings ->see all settings

STEP 5
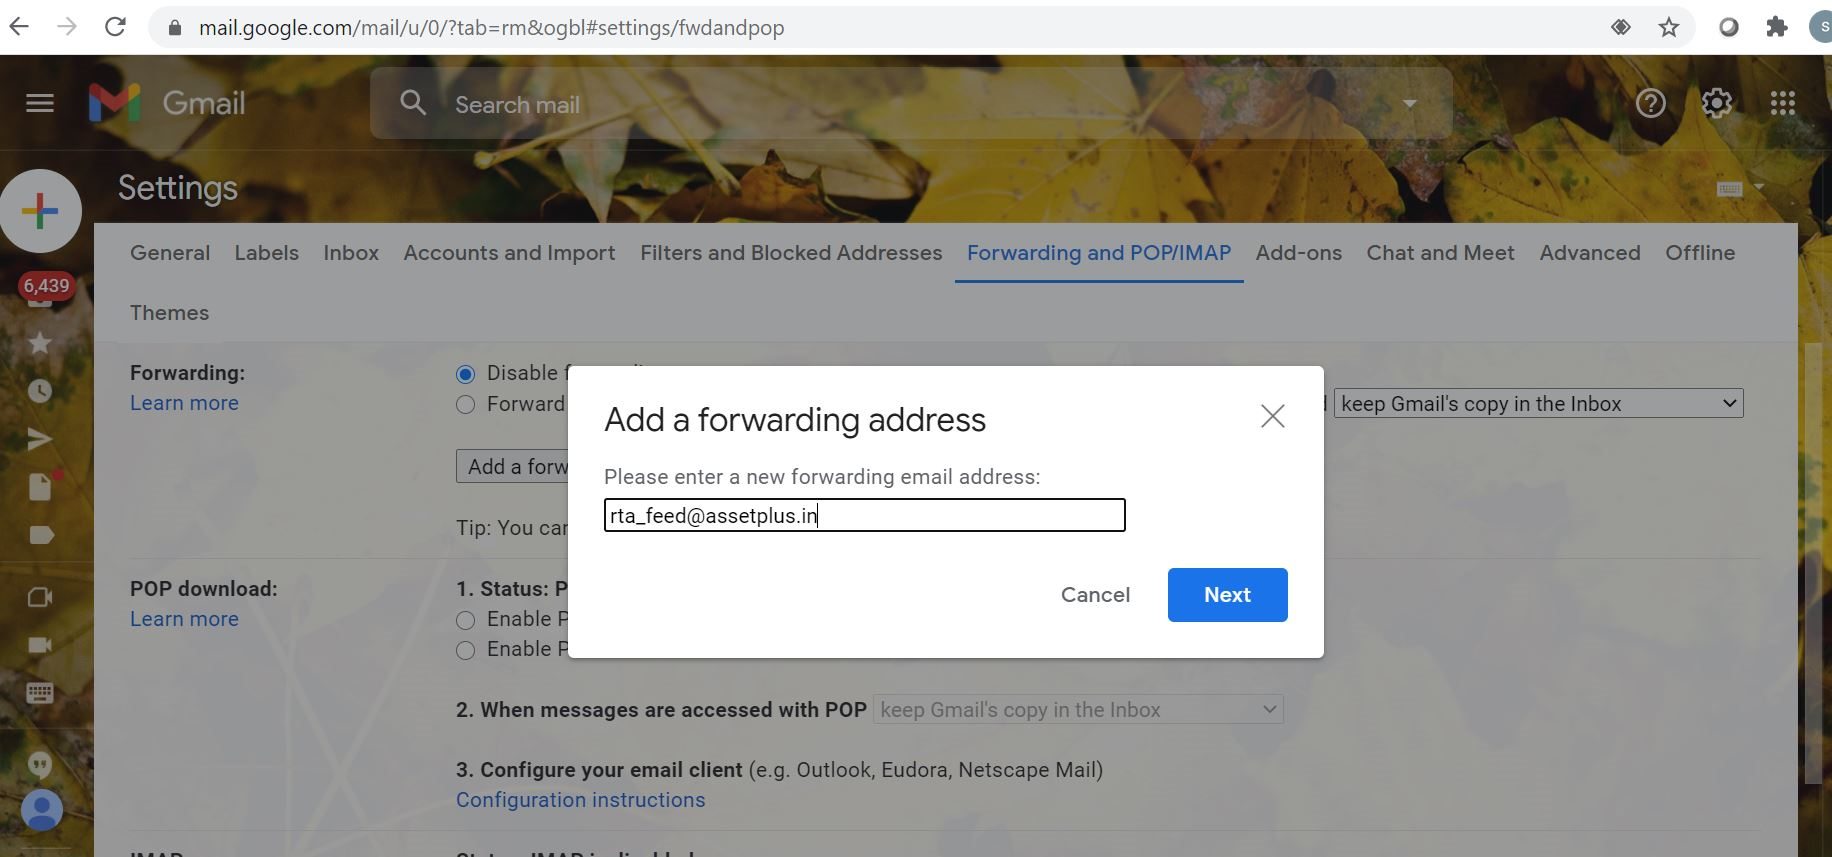
Click on Forwarding and POP/IMAP -> Add a forwarding address

STEP 6
Click on next.
STEP 7
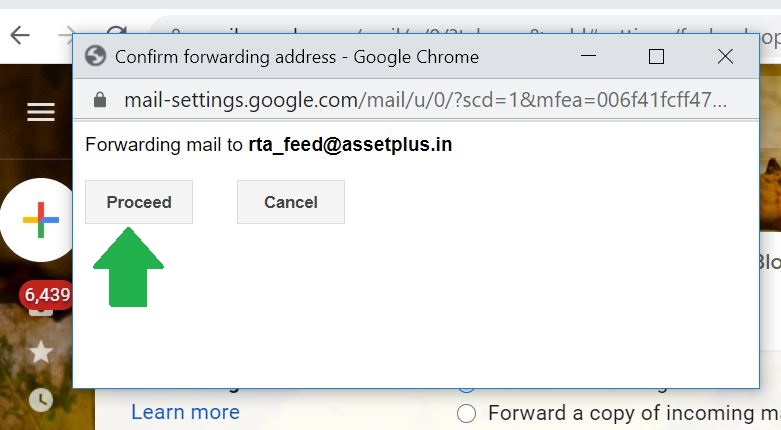
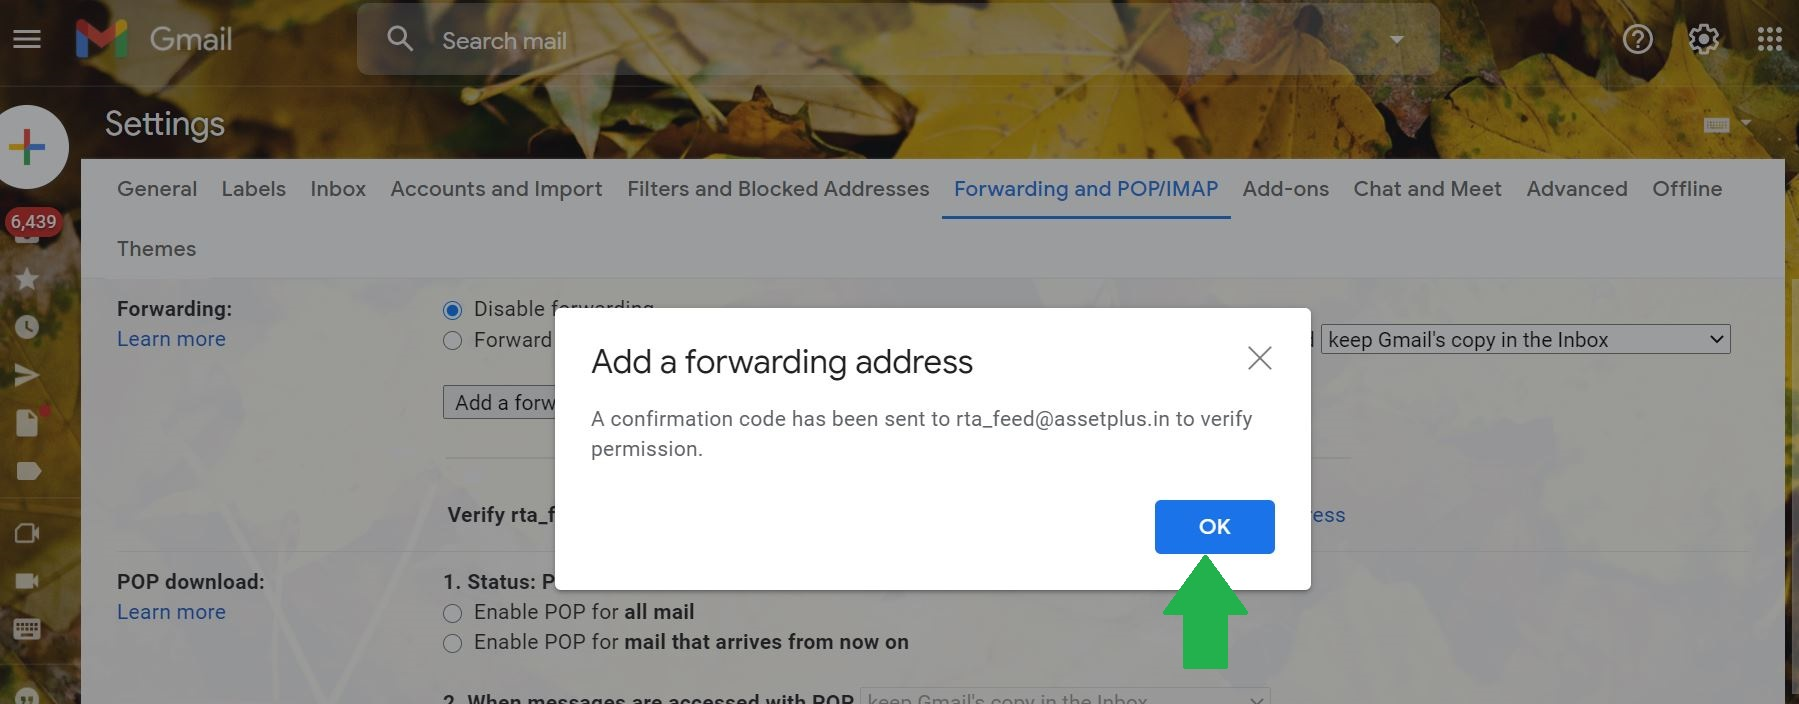
Click on proceed and then OK.
STEP 8
Enter the verification code, you will be receiving that on your registered mail id.
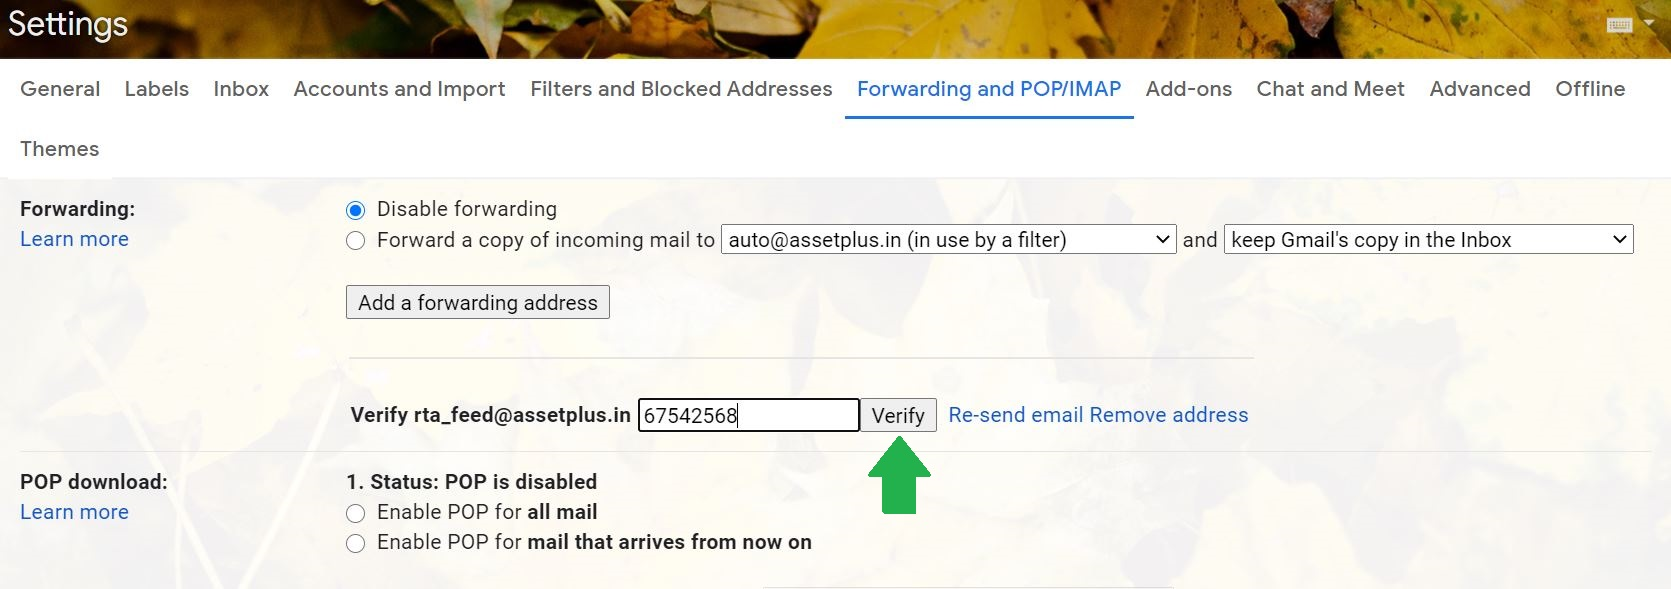
STEP 9
Click on Filters and Blocked Addresses -> Import filters
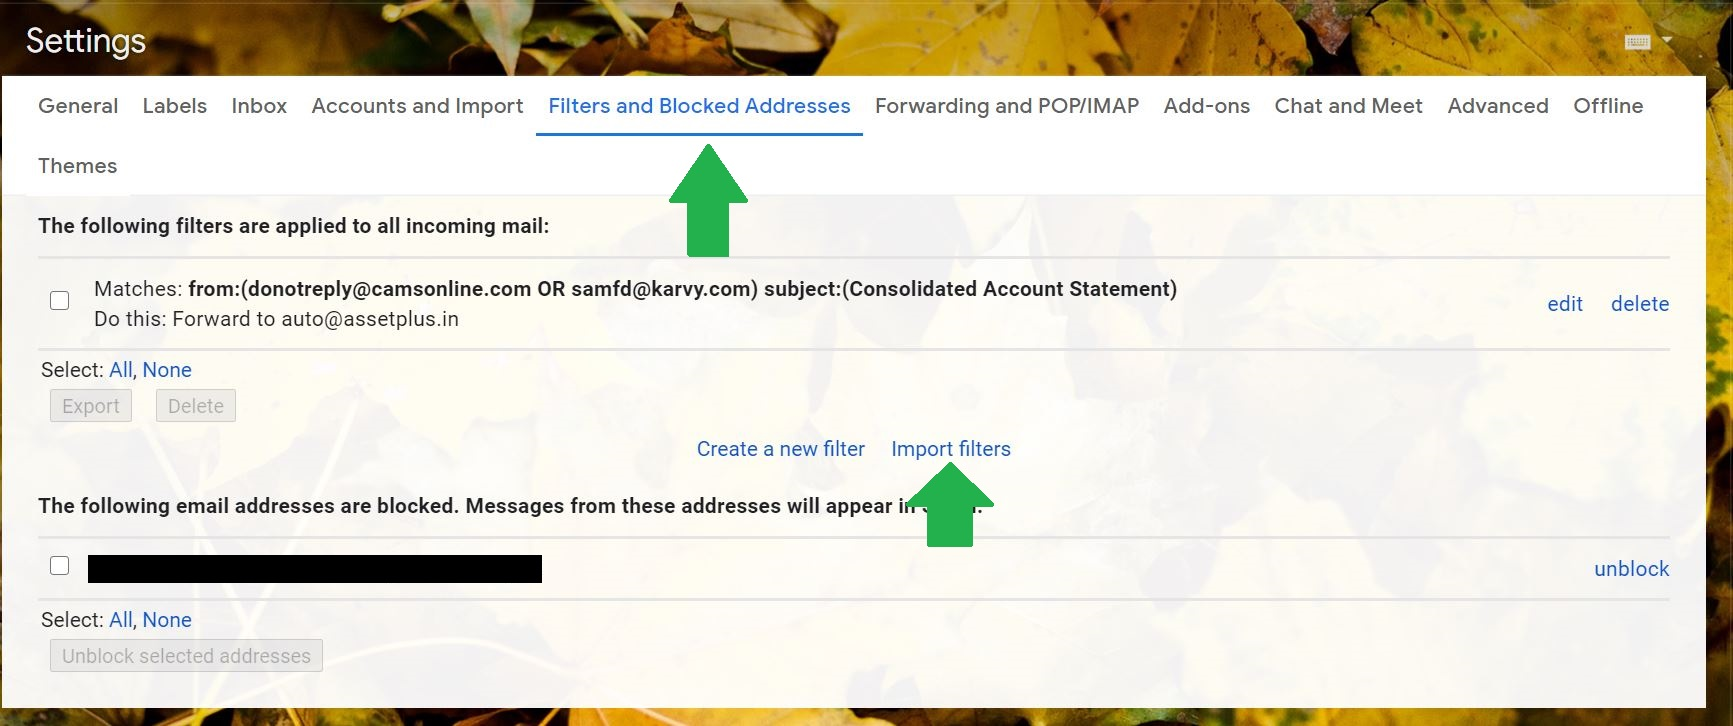
STEP 10
Click on choose file and attach the downloaded file (from step 4). Once the file is uploaded click on open file.
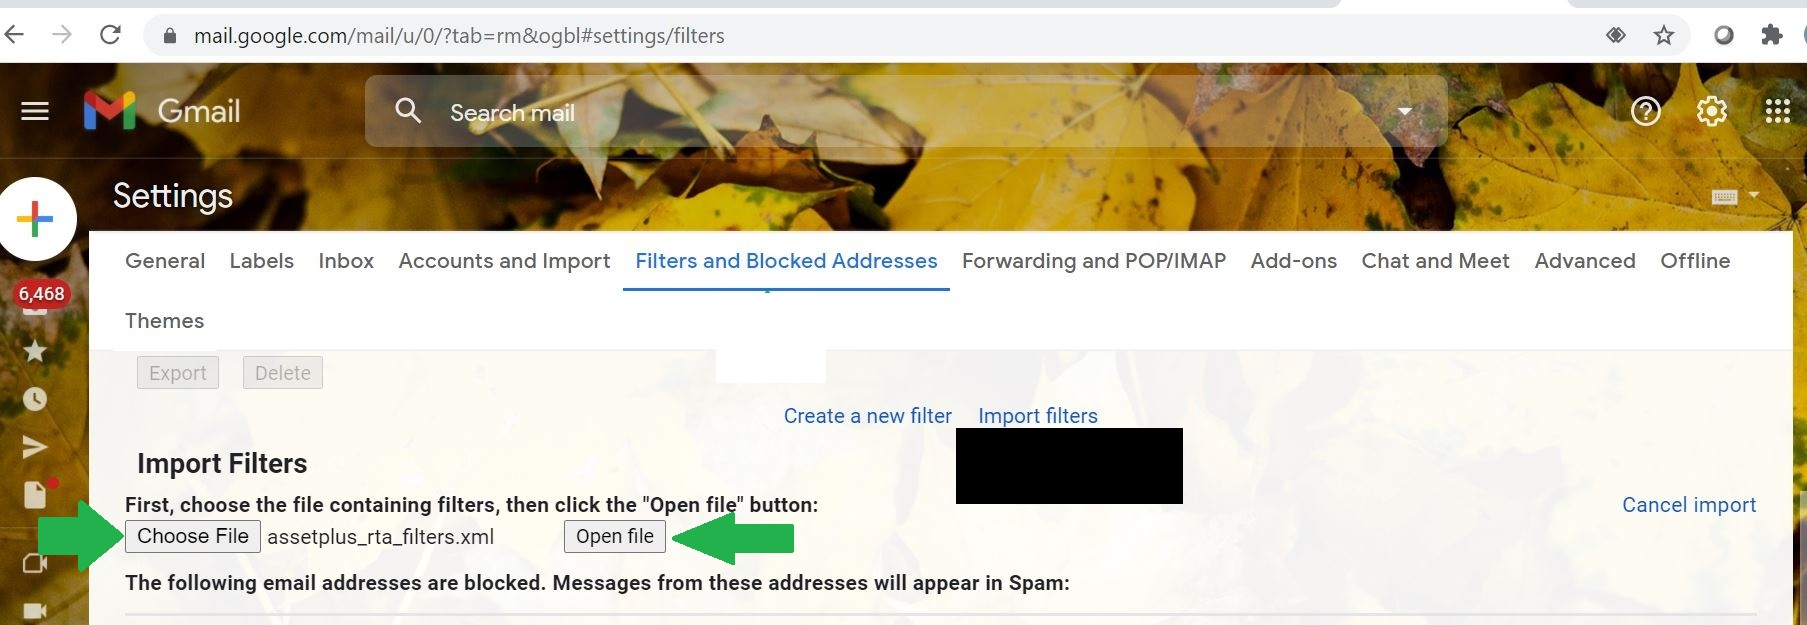
STEP 11
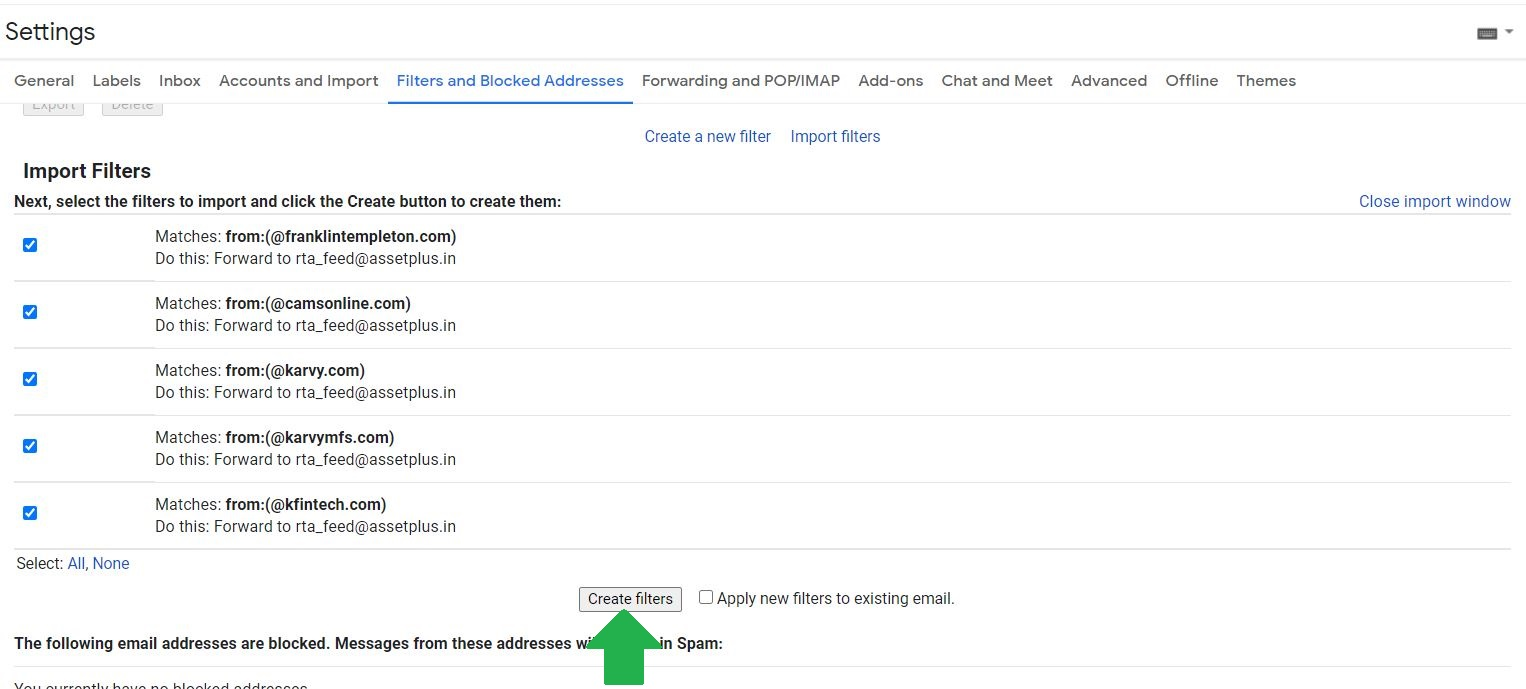
Click on Create Filters. And the process gets completed.
Did you find it helpful?
Yes
No
Send feedback Sorry we couldn't be helpful. Help us improve this article with your feedback.


